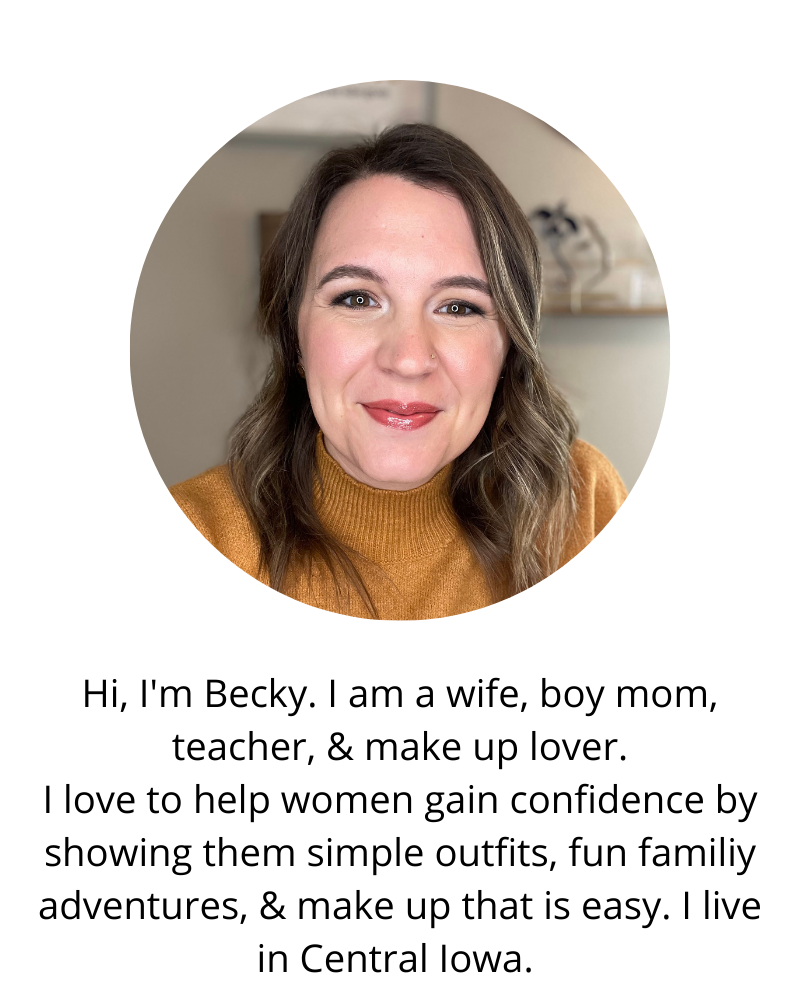
bybmg: June 2013
It's been hot around here the past couple days. I saved this idea to my Summer Checklist Pinterest board just for a day like today. (It's now moved to my Tutorials and Ideas I've Used board.)


I got a new job, so I've been cleaning out my classroom in preparation for the move. I found some fun little caterpillar and spider toys as I was cleaning. I knew they would be perfect for this idea. I gathered a few other random toys from around the house. I threw them in a plastic shoe box and put it in the freezer (which needs defrosted desperately, I know!) One key was that some of the toys float and some sink, so they weren't all on one side of the ice chunk.


The next afternoon, after nap time, I told Henry I had a fun outside surprise for him.


We gathered a couple tools, though the hammer proved to be the most used.


It looked a wee bit dangerous, so we got out some goggles. 


The excitement really started when the first toy, a plastic spider, came out.

Here's a short video of the boy in action.


The goggles didn't last long, but that's ok.


This boy was entertained for almost 45 minutes.


He even learned a few things like he could throw ice chunks to get it to break instead of using the hammer. He talked about the colors of the toys he was finding. Another wonderful thing I can say is that no one was harmed during this activity. Henry never hit himself with the hammer!

All-in-all it was a great idea. It was so easy to do and he had a blast. I'm sure we could do it again later this summer with some other random toys, and he would think it was awesome.


Russ's mom calls my boys her sunshine. She often sends cards with sunshines on them and gave Henry sunflower seeds to plant in our garden. For part of her birthday gift, I had Henry help with a project. 

I didn't document this project well, but here are a couple pictures!

I had a plain frame from Michaels. I used my Cricut to cut out "my sunshine" in vinyl. I put the phrase on the frame, and gave Henry yellow and red acrylic paint.  He painted on it for a while.


I let it dry, then peeled off the letters. The bare wood was left underneath.


I put a photo of my sweet boys inside, and it was ready! Happy Birthday, Grandma!

Linking up with the Sundae Scoop!


We had my family (my parents, brothers, sisters-in-law, niece, and nephews) over today. The guys golfed, and the girls stayed around here with the kiddos. It was a super fun day, and I pulled out an old recipe I had forgotten about but love.

Strawberry. Summer. Cake.


It's a recipe from smitten kitchen. It's seriously so. good. so. easy. All the ingredients, besides the strawberries, are things you'd normally have around.


Also, I found a fun little Pinterest t-shirt idea, so we made them for all the kiddos, with their help of course.


Because of the guys being out golfing, it was my responsibility to get the grill going. This isn't just a "turn on the gas" grill. I had to get the charcoal going for our beautiful green Weber! To say I felt accomplished is an understatement.


It couldn't have been more perfect weather! We got out the bubble machine, squirt guns and the sprinkler.

I LOVE SUMMER!


My left wrist

Almost two years ago, I got a tattoo. To people who knew me growing up, or even many who know me now, this was a bit of a shock. I'm not the typical tattoo girl, and I got it in a very visible place.  It wasn't a spur of the moment thing. I'd been thinking about it for almost a year.


I saw trees painted like this a few years ago, and I started to paint some myself. We have a collection above our bed.

I drew the design for the tattoo myself and took it to Skin Kitchen (what a fun name for a tattoo parlor!) with my friend, Jamie. Really, the pain wasn't as bad as I'd thought. It was the sunburn like pain after that was worse than the actual inking.


Russ had a necklace made for me to match my tattoo. He's so thoughtful!

I wanted the tree to mean something. So, each circle has a specific meaning. The three big ones on the bottom are my foundation, my faith. They represent the Trinity: blue - God the Father, red - God the Son, and yellow - God the Holy Spirit. The smaller on the top are my family: pink - me, orange - Russ, and green - Henry. Because of price, pain, etc., I don't plan to add any more kiddos (Wesley and future), until we're sure our family is complete.

It's fun explaining it to people when they ask, and I'm happy with it still two years later. I'm glad it's in a place where I see it often - a great reminder of why I'm here.
This was a guest post I did last August for Keeping It Simple. Enjoy!

 -----------------------------------------------------------------------------------

I find myself purchasing many v-neck tees and sometimes I like to spice them up. I found this cute idea for a tie necklace on Pinterest and decided that instead of a necklace, I would attach it permanently to the shirt. I knew going into this that this shirt would be a forever hand wash item because of the delicacy of the tie, but it was worth it.  I made a shirt for myself, but didn't document the process well, so this time around to make one for my friend, Jamie.

First, I went to Goodwill and found a tie that coordinates with the shirt Jamie gave me.

Next, I started pleating and pinning the tie. I didn't measure or use math, I just did what looked good. 

I continued to do this until the pleating reached the shoulder seam of my shirt.
  I left enough tie to extend flat along the back of the neckline and then started pleating again in the opposite direction I was before so the folds pointed up toward the shoulder from both sides of the collar.
Once I got to the end, I had to do a little readjusting to make the tie end up where I wanted to. Like I said, I didn't use math or measure, so I just did a little unpinning and repinning until it looked how I wanted it to. I pinned the pleated tie to the collar of the shirt, leaving the wide end of the tie unpinned so I could overlap at the end.
 I began sewing the tie from the end working to keep the stitch centered.
I sewed around the back of the shirt and stopped when I hit the second shoulder seam where I would be going back down the front of the shirt. 
 I look it off the machine and pinned the end of the tie down.


Then I began sewing again. This part requires a little patience to make sure the pleats go under the presser foot on your machine and don't bunch up. I had to do a bit of holding them firm and lifting the presser foot to make sure they would go under neatly. 

 I sewed to the end making sure it overlapped, then I was done!
The whole project took me about 30 minutes.

Here's Jamie in her CUTE shirt!

If you haven't been over to my Etsy shop in a while, hop on over! There's a few new, fun things in there.

I've seen these scrappy buntings around a lot, so I decided to try to make one myself. I love how it turned out, and it can be yours!


Wesley's pacifier is always falling out. I love paci leashes, and you know I love chevron!


This is a cute little pencil pouch made from a Toms flag. Perfect for back to school (but you probably don't want to think about school yet!).


I have many Toms flag items. Check that part of my shop


If you follow my What I Wore Wednesday posts, you may notice that there's always a few items that are thrifted. We have a Goodwill store about a mile from us, and about every couple weeks, after the kiddos are settled into a nap, I often find myself there. While I was pregnant, I didn't look for myself there much because their maternity rack is pretty slim. I shop for the kiddos there because $1.89 (I think) is pretty cheap for their clothes. I realize they aren't garage sale prices, but it's difficult to get out to garage sales with littles in tow.

This Sunday I found myself at Goodwill again. Here's what I found:


LC by Lauren Conrad Top - I think this will look great with shorts this summer and transition well to some gray pants back at school this fall.


Banana Republic Cargo Skirt - I'm trying not to buy too many bottoms as I hope to slim down some more, but this one is cute and casual for outings this summer.


Merona Striped Top - I see this paired with a scarf, shorts, and sandals this summer. 


Daisy Fuentes Sleeveless Top - I think this could pair with my maxi skirts for a little more dressy look than usual tank tops. We will see! This was half off. Sundays at our Goodwill are 1/2 price day off of a specific colored tag. If you have a Goodwill nearby, find out when their 1/2 price tag day is and you may find some steals.

 When I saw this pin on Pinterest, I was quickly swayed to go buy a tube of cinnamon rolls! We don't usually keep them around the house, but I figured they would be a great treat for the long Memorial Day weekend.


These are the rolls I bought.


We have a smaller waffle iron than the originator of the idea, so I just did two at a time. (Don't mind the dirty waffle iron, that was left over cinnamon residue from the first set I made.)


They didn't need to be on the iron for more than a couple minutes. The tutorial said 2.5-3 minutes. I didn't time it, I just kept an eye on them. This is how they looked after cooking.


Henry and Russ definitely approved. 


We used the frosting from the rolls instead of syrup. Not healthy, but so what! They were delicious and easy - no dripping waffle batter to deal with. (P.S. I don't like certain foods to touch, so a while back my mom bought me a couple divided Corelle plates. I'm silly, I know!)

I found this wonderful Old Navy t-shirt at Goodwill before spring break. It was workable for my expanding belly, but still worked post-baby too.


I'm not sure if I bought it with a hole in the armpit, or if I caused the hole.  Anyhow, it didn't seem worth fixing. I wasn't that in love with the shirt, so I threw it in the rag or donate pile. But, then it caught my eye, and I thought it'd make a pretty scarf. So, during nap time, I decided to tear it apart and see what happened.


 I cut up the side and removed the seams.


It looked like this. Then I cut across right below the arm pits.


That resulted in a trapezoid shape, but I trimmed it up to look more like a rectangle/square.


I cut each in half vertically, which resulted in four total pieces.


Then I went ahead and sewed them together. I did the hems together and the unfinished cut sides together.


This piece was a little uneven. I sewed it anyway, and trimmed it up when I was done. 


I trimmed the hem edges down to a very small seam.


The great thing about working with t-shirt material is that it doesn't really fray, so unfinished edges work.


There is is, in this beautiful selfie I took.


 Russ was holding Wesley, and he was a little fussy, but I wanted a non-selfie. So, I took the babe, and Russ captured a few pictures of me holding him.


Yep, NOT a happy baby at that moment, but this is real life, right?!  

I'd love to see your version of this if you make one!

Linking up with 
The DIY'ers
Impact-Site-Verification: 574454573. Powered by Blogger.